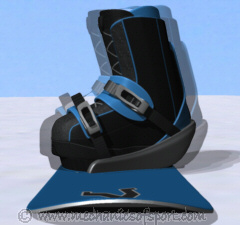
Snowboard Setup
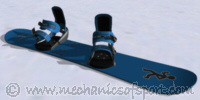
When you set up a snowboard there are several things to consider before you can have the bindings on and be ready to go. Here everything that needs to be decided on is gone through step by step, with information and advice to help work out what will work best for you.
Regular or Goofy
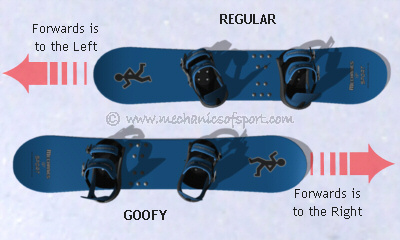
The first thing we need to work out our footedness. Since on a snowboard we stand sideways to the direction the board points, we either have to go to our left or to our right. Regular is where you ride left foot first (forwards is to your left), and goofy is where you ride with your right foot first (forwards is to your right). Some people know instinctively which way they should ride, for people who don't, there are several methods that can be used to try and work it out. Getting people to imagine they are surfing or skateboarding, and then say which way is forwards in their imagination generally works well. Another good method is to have your back foot as the foot you would kick a football with. Unfortunately none of the methods to work out if you are regular or goofy are as reliable as would be nice. Some people will even switch between regular and goofy several times before they decide which is best for them. If you take snowboard lessons, one thing the instructor will look for and check on is that you are riding in the direction that is best for you.
The Mechanics of Sport Snowboarder is regular, so the rest of the set up here is done with the bindings set in a regular stance.
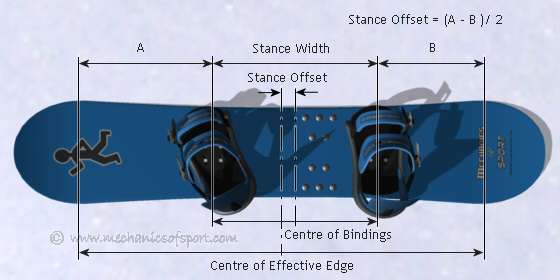
Stance Width
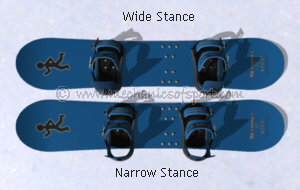
Next you need to decide how far apart you want to have your feet. As a general rule your stance width should be a little wider than your shoulders (or roughly 29% of your height for men, and 27% of your height for women). This might need adjusting though depending on what you want to do, and what you feel comfortable with. Freestylers will often have a wider stance to help them throw the snowboard around, and for more stability on landings. Freeriders often have a slightly narrower stance as it makes turning and piste riding easier. Freeriders also don't need to throw their weight along the board so much, so have no need for that extra stability along the board. If you haven't snowboarded before it's advised to start with the bindings just over shoulder width apart, and then adjust them from there if you feel you need to.
Stance Offset (Setback)
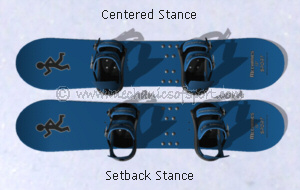
Before you can attach the bindings to the board you need to decide where along the board the bindings should be positioned. Most boards have the holes for the bindings offset by the recommended amount for the board, but you can still change where you put them. Someone looking to concentrate strongly on freestyle with a suitable freestyle snowboard, will put the bindings in the middle of the board, as it makes spinning the board, and riding switch easier. Whereas someone who is looking to do a lot of off-piste snowboarding with a more freeride orientated snowboard, will put the bindings further towards the back of the board, as it helps the snowboard to float in the powder. Whatever you do the bindings should not be closer to the front of the board than the back. Most snowboarders are all-mountain riders who do a bit of everything, and will have the bindings set back just a bit, as it is a good position for piste riding and will handle freestyle and powder fairly well too.
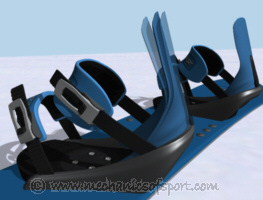
Binding Angles
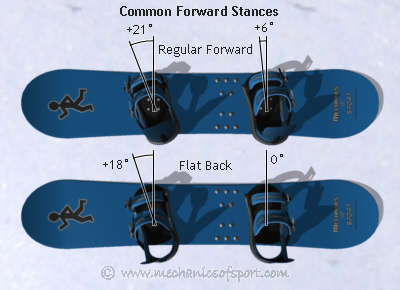
The next thing to work out is the angle each binding should be set to. The splines on the mounting discs normally let you set the angle of each binding in 3 degree intervals, which can be adjusted while the mounting screws are loose. Binding angles are refered to in degrees with 0° being flat across the snowboard, a positive angle for when the toes are turned towards the front of the board, and a negative for when the toes are turned towards the back of the board. When binding angles are quoted like +21°/+6° the first value always refers to the front foot, irrespective of whether the rider is regular or goofy.
For different types of snowboarding there are different general binding setups, although these all change with the personal preference of the rider.
Forward Stance
For general snowboarding, carving and off-piste snowboarding, a forward stance is good. This is where both bindings are angled forwards, with the front binding usually between +30 and +12 degrees and the back binding usually between +12 and 0 degrees. This stance is a comfortable stance, it lets you see where you are going well, and is also good for beginners. One place where it struggles though is riding switch, as it is harder to see where you are going, and puts your body in an uncomfortable position. This is why for freestylers a forward stance is generally not the stance of choice.
Duck Stance
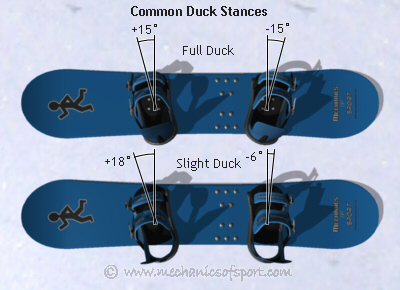
For freestyle the duck stance is very popular, this is where the front foot is angled forwards and the back foot is angled backwards. Although this might not be the most comfortable stance for some, it is good at allowing you to snowboard in either direction along the board, which is very handy for freestyle where snowboarding backwards (switch, fakie) is very important. When both feet are at the same angle (i.e. +15°/-15°) it is called a full duck, or mirrored stance, and when the back foot is not angled as much as the front it can be called a slight duck. The duck stance can also be used for beginners on a freestyle board with a centred stance, this makes the board the same to ride in either direction, which is good for anyone who initially can't decide if they are regular or goofy and needs to experiment.
Although most commonly used for freestyle, the duck stance can be used for any style of riding, it just comes down to personal preference. It's not uncommon for freeriders to use it, and it can even help them to perform tricks in the powder.
Flat Stance
Another stance that is reasonably common is the flat stance, where both bindings are at 0 degrees with no angle on them. This again makes it reasonably easy to ride in both directions, and some find it more comfortable than a duck stance.
Beginners
If you have never snowboarded before, it is recommended that you start off with binding angles of close to +21°/+6°, and after you have snowboarded for a bit you can then start to experiment with other angles once you start developing preferences.
Binding Position Across The Board
Before tightening the mounting screws completely, you need to make sure that the bindings are in the right place across the board, so that neither your toes or heels come too far of off the board. This is normally adjusted by sliding the bindings along the grooves in the mounting disc where the mounting screws go. Your toes and heels should come over the side of the board by about 1.5cm (1/2") but not so far that they will catch in the snow easily. Once you have this right you can tighten up the mounting screws and set the bindings firmly in place.
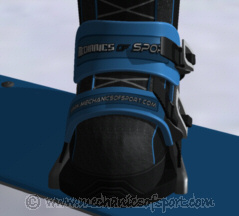
Highback Angles
The angle of the highback is also adjustable, and will change the responsiveness of the bindings when you lean backwards (the responsiveness of heel-side turns). To make them more responsive, lean the highbacks forwards more, to make them less responsive lean them back more. Leaning them forwards will make you bend your knees more which is generally good for your stance, but if you lean them forwards too much your legs will get tired a lot more easily and you will lose some of the movement in your legs making it harder to turn. Leaning the highbacks over too far is rarely a problem though, as the normal adjustment on most bindings does not go this far.
Sometimes the highbacks can also be adjusted so that they are in line with the back edge, this makes any force put on them transmitted directly in the direction that it needs to act.
Strap Lengths
One last thing to do is to make sure the binding straps are the right length. With your feet in the bindings you should be able to easily put the plastic ladder straps into the buckles until the ratchets click, yet once the bindings are done up fully the buckles should not be right at the end of the ridges on the ladder straps. If this is not the case the length of the main strap needs adjusting, the adjustment system is normally half way along the strap where the padding starts.
Attaching a Stomp Pad
If you need to attach a stomp pad to the board, it is best to clean the board with alcohol first so that there is no grease or anything that would weaken the bond with the adhesive on the stomp pad and the snowboard. Then take the backing off of the pad and place it on the board where you want it, making sure you press it hard onto the board. If possible it is best to leave the board with something heavy sat on the stomp pad for a couple of hours, to make sure the adhesive bond is as strong as possible, before you use it.
On to the Catching An Edge section to learn about one of the most common reasons for snowboarders to crash.